LED Schmetterling
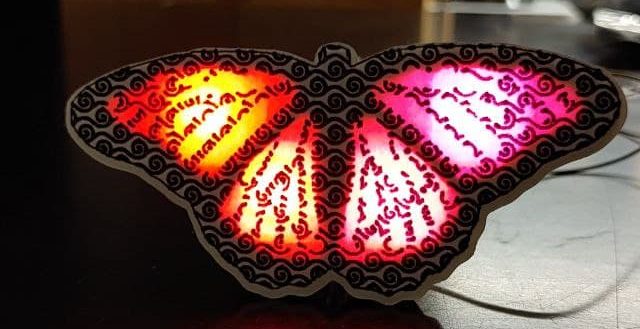
Ein wirklich schönes Projekt, das man sich auch einfach ins Zimmer hängen kann, ist der Schmetterling. Aus Holzpappe und Papier zusammengeklebt und mit wenigen Komponenten zum leuchten gebracht ist er immer ein Hingucker.
Dateien zum Herunterladen
Dateien zum Download stehen leider noch nicht zur Verfügung.
Materialien
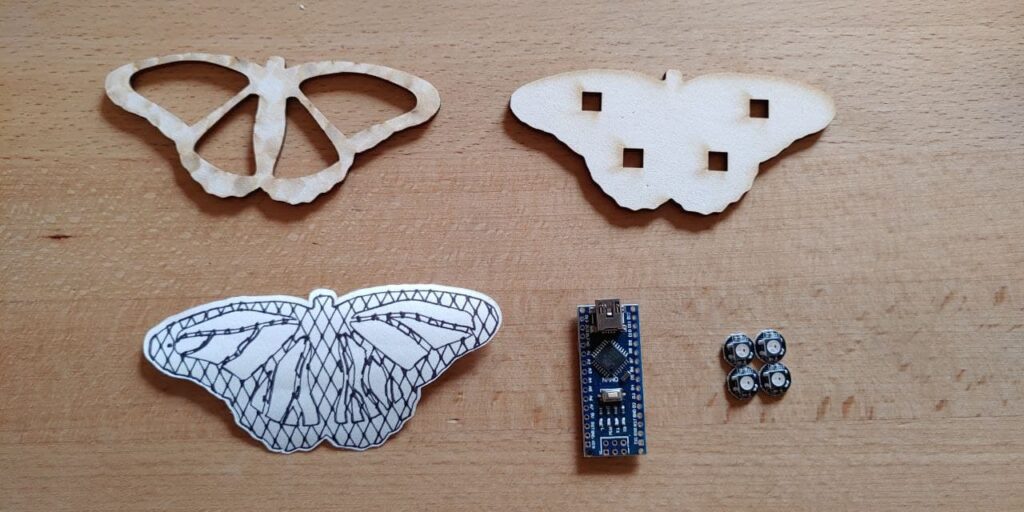
- vier WS2812 – RGB-LEDs
- einen Arduino Nano
- Litze bzw Draht
- die gelaserten Bauteile
- Papier-Zierteil
- Lötgerät
- Holzleim und Heißkleber
WS2812 LEDs
Die LEDs in diesem Projekt sind WS2812 LEDs. Das ist eine Variante von RGB-LEDs, die über einen kleinen eingebauten Chip verfügen. Dieser ermöglicht es, die LEDs einzeln anzusteuern und jeder LED eine eigene Farbe zuzuweisen. Das funktioniert über do genannte Schieberegister. Dabei wird am Beginn des Streifens ein Wert an der Input-Seite der LED “eingeschoben. Ein kleiner Pfeil an der LED gibt die Richtung an. Sobald ein weiterer Wert am Input ankommt, wird der aktuelle Wert am Output der LED an den Input der folgenden LED weitergegeben und so weiter.
Arduino Nano
Der Arduino Nano ist ein ATMEGA-basiertes Developerboard und eignet sich Aufgrund des Formfaktors und des günstigen Preises für kleine Projekte. Er kann mit C/C++ programmiert werden. Das hört sich erstmal kompliziert an, ist aber mit etwas anleitung kein Problem.
Laser Cutter
Die Bauteile für das Projekt kommen aus dem Laser Cutter und sind aus Finnpappe hergestellt. Finnpappe ist ein Material aus verpresster Cellulose und lässt sich daher sehr einfach und sauber mit dem Laser Cutter bearbeiten. Außerdem ist das Material sehr schnell mit Holzleim verklebbar.
Schritt für Schritt
Schritt 1
Mit dem Laser Cutter können alle notwendigen Bauteile ausgeschnitten werden. Die Dateien sind oben verlinkt und können heruntergeladen werden. Das Frontteil aus Papier muss ausgedruckt und ausgeschnitten werden.
Schritt 2
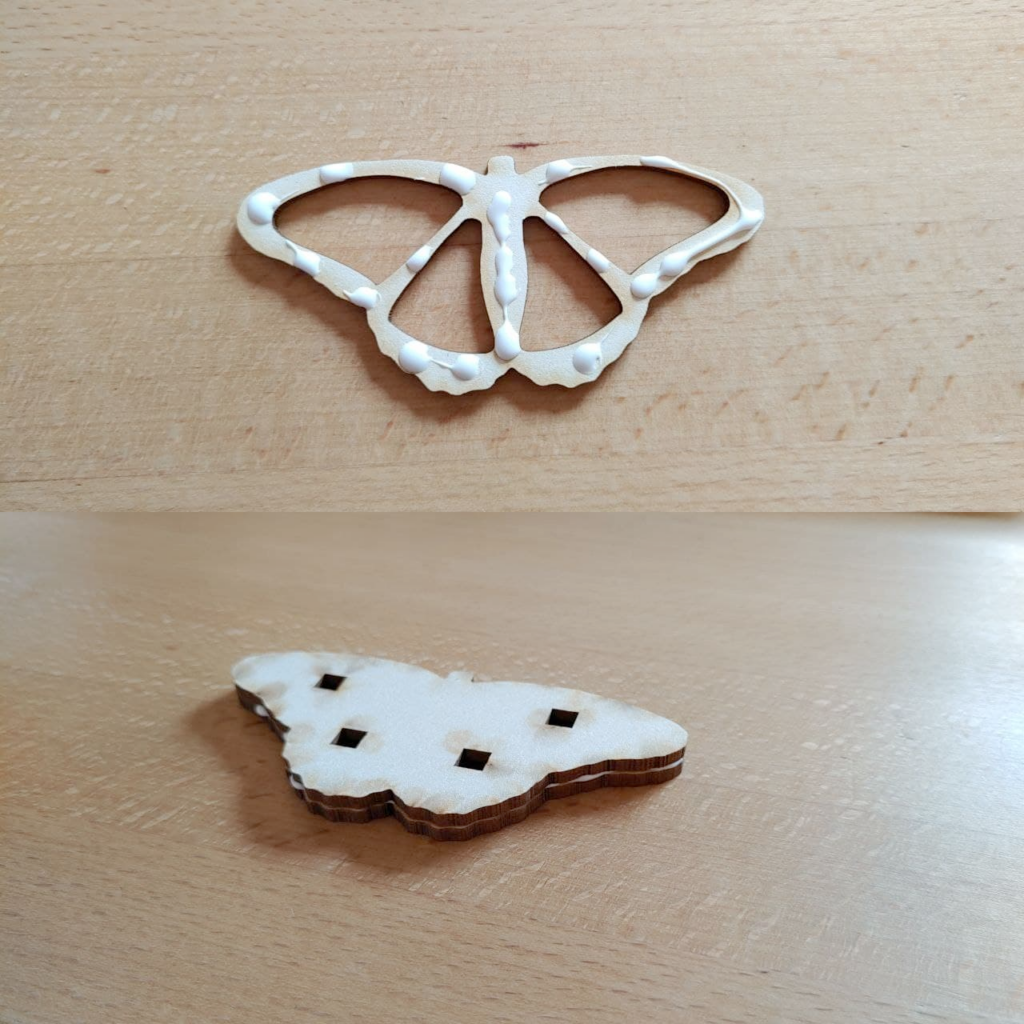
Mit etwas Holzkleber können die beiden Bauteile aus Finnpappe übereinander geklebt werden. Dabei ist nur darauf zu achten, dass sie Deckungsgleich übereinander liegen.
Holzleim, der zur Seite herausquillt, kann einfach abgewischt werden.
Schritt 3
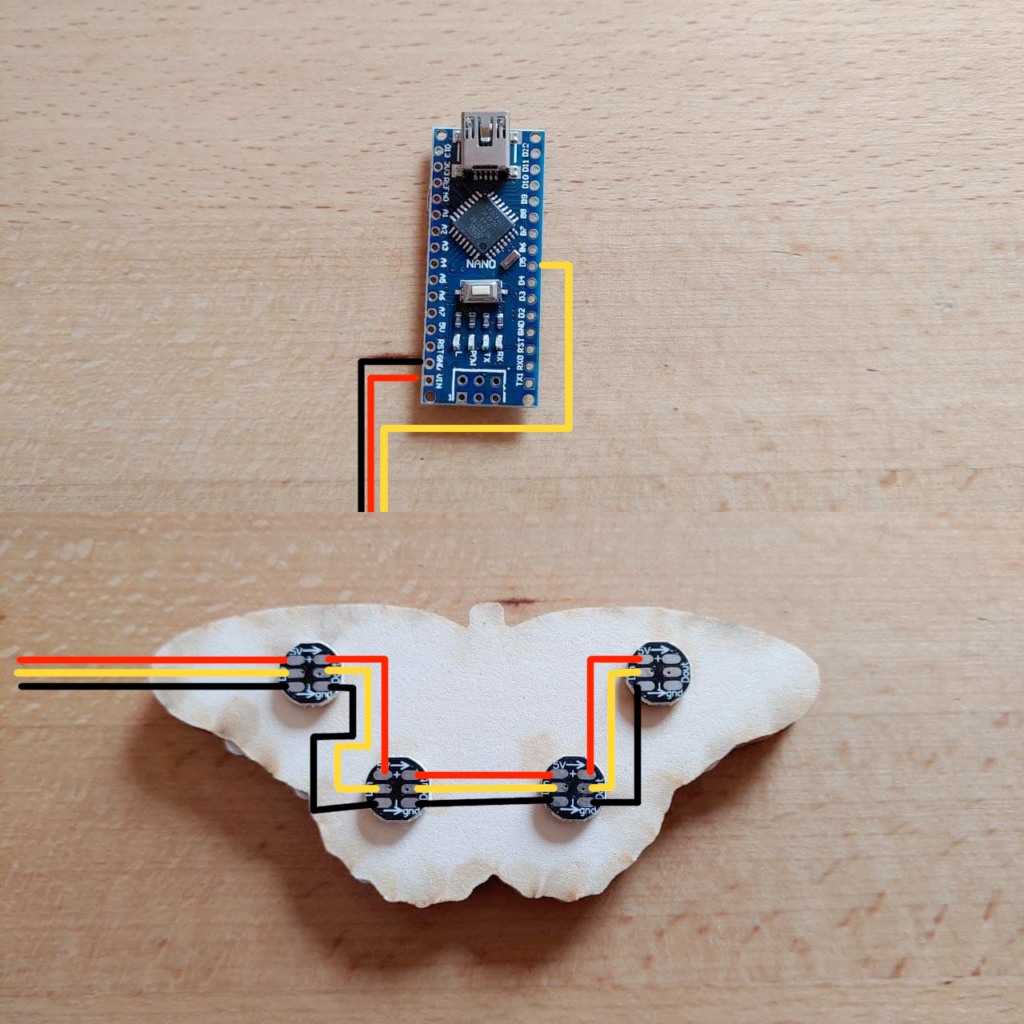
Von hinten werden nun die LEDs in die vier rechteckigen Löscher gesetzt. Dabei ist wichtig, dass alle Pfeile in die gleiche Richtung zeigen. Die Richtung selbst ist nicht besonders wichtig. Hier im Beispiel zeigen alle Pfeile von Links nach Rechts. Entsprechend ist nachher der Input vom Microcontroller auf der linken Seite.
Alle Lötpads der LEDs müssen jetzt mit Lötzinn verzinnz werden.

Schritt 4
Bei den LEDs müssen jetzt alle Kontakte für 5V (rot) miteinander und zum Schluss mit VIN vom Microcontroller verkabelt werden. Das gleiche mit den Pins für GND (schwarz).
Die gelben Verbindungen müssen von LED zu LED verbunden werden. Außerdem muss der Pin D5 mit dem Daten-Eingang der ersten LED verbunden werden.
Projekt anlegen
Projekt anlegen
Als erstes müssen wir uns ein neues Projekt in PlatformIO anlegen. Dazu können wir in Visual Studio Code unten auf das “Haus” Icon von PlatformIO klicken und dort ein neues Projekt erstellen. Sobald alles erstellt ist haben wir links im File
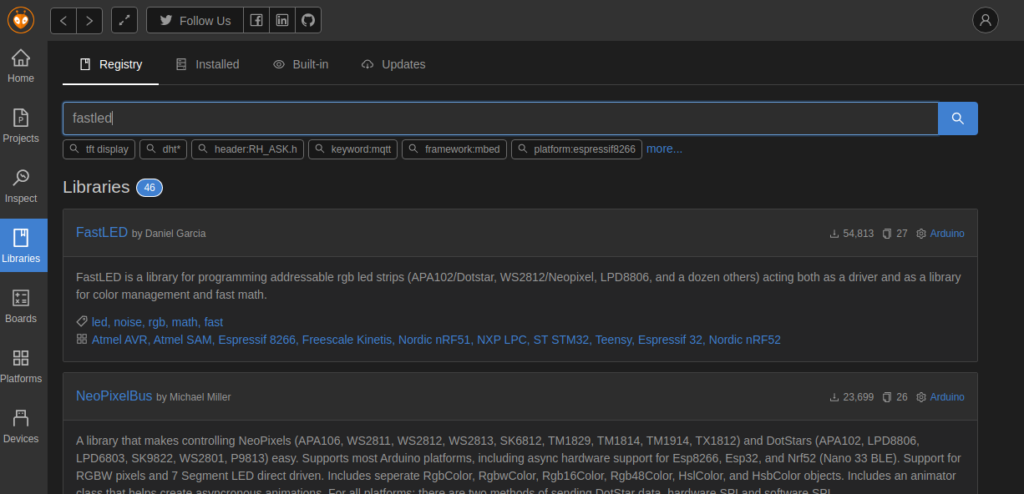
Für unseren Schmetterling verwenden wir eine Bibliothek mit dem Name FastLED. Diese Bibliothek müssen wir in unser Projekt installieren. Dazu gehen wir in der PlatformIO Home Ansicht links auf Libraries und geben dort in die Suche “FastLED” ein.
Nachdem wir auf den Eintrag in der Liste geklickt haben, können wir oben den Punkt “Zum Projekt hinzufügen” auswählen und damit die Bibliothek installieren.
Der Code für den Schmetterling ist eine angepasste Version des FastLED Demo Code verwedet. Der Code kann von hier komplett herunter geladen und verwendet werden. Details zum Progammieren findet ihr in dem oben verlinkten Artikel über Arduino und PlatformIO.
Code
Bei den LEDs müssen jetzt alle Kontakte für 5V (rot) miteinander und zum Schluss mit VIN vom Microcontroller verkabelt werden. Das gleiche mit den Pins für GND (schwarz).
Die gelben Verbindungen müssen von LED zu LED verbunden werden. Außerdem muss der Pin D5 mit dem Daten-Eingang der ersten LED verbunden werden.
					#include <Arduino.h>

#include <FastLED.h>

#define LED_PIN     5
#define NUM_LEDS    8
#define BRIGHTNESS  255
#define LED_TYPE    WS2811
#define COLOR_ORDER GRB
CRGB leds[NUM_LEDS];

#define UPDATES_PER_SECOND 20

// This example shows several ways to set up and use 'palettes' of colors
// with FastLED.
//
// These compact palettes provide an easy way to re-colorize your
// animation on the fly, quickly, easily, and with low overhead.
//
// USING palettes is MUCH simpler in practice than in theory, so first just
// run this sketch, and watch the pretty lights as you then read through
// the code.  Although this sketch has eight (or more) different color schemes,
// the entire sketch compiles down to about 6.5K on AVR.
//
// FastLED provides a few pre-configured color palettes, and makes it
// extremely easy to make up your own color schemes with palettes.
//
// Some notes on the more abstract 'theory and practice' of
// FastLED compact palettes are at the bottom of this file.


CRGBPalette16 currentPalette;
TBlendType    currentBlending;

extern CRGBPalette16 myRedWhiteBluePalette;
extern const TProgmemPalette16 myRedWhiteBluePalette_p PROGMEM;


void FillLEDsFromPaletteColors( uint8_t colorIndex)
{
    uint8_t brightness = 255;

    for( int i = 0; i < NUM_LEDS; ++i) {
        leds[i] = ColorFromPalette( currentPalette, colorIndex, brightness, currentBlending);
        colorIndex += 3;
    }
}


// This function fills the palette with totally random colors.
void SetupTotallyRandomPalette()
{
    for( int i = 0; i < 16; ++i) {
        currentPalette[i] = CHSV( random8(), 255, random8());
    }
}

// This function sets up a palette of black and white stripes,
// using code.  Since the palette is effectively an array of
// sixteen CRGB colors, the various fill_* functions can be used
// to set them up.
void SetupBlackAndWhiteStripedPalette()
{
    // 'black out' all 16 palette entries...
    fill_solid( currentPalette, 16, CRGB::Black);
    // and set every fourth one to white.
    currentPalette[0] = CRGB::White;
    currentPalette[4] = CRGB::White;
    currentPalette[8] = CRGB::White;
    currentPalette[12] = CRGB::White;

}

// This function sets up a palette of purple and green stripes.
void SetupPurpleAndGreenPalette()
{
    CRGB purple = CHSV( HUE_PURPLE, 255, 255);
    CRGB green  = CHSV( HUE_GREEN, 255, 255);
    CRGB black  = CRGB::Black;

    currentPalette = CRGBPalette16(
                                   green,  green,  black,  black,
                                   purple, purple, black,  black,
                                   green,  green,  black,  black,
                                   purple, purple, black,  black );
}


// This example shows how to set up a static color palette
// which is stored in PROGMEM (flash), which is almost always more
// plentiful than RAM.  A static PROGMEM palette like this
// takes up 64 bytes of flash.
const TProgmemPalette16 myRedWhiteBluePalette_p PROGMEM =
{
    CRGB::Red,
    CRGB::Gray, // 'white' is too bright compared to red and blue
    CRGB::Blue,
    CRGB::Black,

    CRGB::Red,
    CRGB::Gray,
    CRGB::Blue,
    CRGB::Black,

    CRGB::Red,
    CRGB::Red,
    CRGB::Gray,
    CRGB::Gray,
    CRGB::Blue,
    CRGB::Blue,
    CRGB::Black,
    CRGB::Black
};


// Additional notes on FastLED compact palettes:
//
// Normally, in computer graphics, the palette (or "color lookup table")
// has 256 entries, each containing a specific 24-bit RGB color.  You can then
// index into the color palette using a simple 8-bit (one byte) value.
// A 256-entry color palette takes up 768 bytes of RAM, which on Arduino
// is quite possibly "too many" bytes.
//
// FastLED does offer traditional 256-element palettes, for setups that
// can afford the 768-byte cost in RAM.
//
// However, FastLED also offers a compact alternative.  FastLED offers
// palettes that store 16 distinct entries, but can be accessed AS IF
// they actually have 256 entries; this is accomplished by interpolating
// between the 16 explicit entries to create fifteen intermediate palette
// entries between each pair.
//
// So for example, if you set the first two explicit entries of a compact
// palette to Green (0,255,0) and Blue (0,0,255), and then retrieved
// the first sixteen entries from the virtual palette (of 256), you'd get
// Green, followed by a smooth gradient from green-to-blue, and then Blue.


// There are several different palettes of colors demonstrated here.
//
// FastLED provides several 'preset' palettes: RainbowColors_p, RainbowStripeColors_p,
// OceanColors_p, CloudColors_p, LavaColors_p, ForestColors_p, and PartyColors_p.
//
// Additionally, you can manually define your own color palettes, or you can write
// code that creates color palettes on the fly.  All are shown here.

void ChangePalettePeriodically()
{
    uint8_t secondHand = (millis() / 1000) % 60;
    static uint8_t lastSecond = 99;

    if( lastSecond != secondHand) {
        lastSecond = secondHand;
        if( secondHand ==  0)  { currentPalette = RainbowColors_p;         currentBlending = LINEARBLEND; }
        if( secondHand == 10)  { currentPalette = RainbowStripeColors_p;   currentBlending = NOBLEND;  }
        if( secondHand == 15)  { currentPalette = RainbowStripeColors_p;   currentBlending = LINEARBLEND; }
        if( secondHand == 20)  { SetupPurpleAndGreenPalette();             currentBlending = LINEARBLEND; }
        if( secondHand == 25)  { SetupTotallyRandomPalette();              currentBlending = LINEARBLEND; }
        if( secondHand == 30)  { SetupBlackAndWhiteStripedPalette();       currentBlending = NOBLEND; }
        if( secondHand == 35)  { SetupBlackAndWhiteStripedPalette();       currentBlending = LINEARBLEND; }
        if( secondHand == 40)  { currentPalette = CloudColors_p;           currentBlending = LINEARBLEND; }
        if( secondHand == 45)  { currentPalette = PartyColors_p;           currentBlending = LINEARBLEND; }
        if( secondHand == 50)  { currentPalette = myRedWhiteBluePalette_p; currentBlending = NOBLEND;  }
        if( secondHand == 55)  { currentPalette = myRedWhiteBluePalette_p; currentBlending = LINEARBLEND; }
    }
}

void setup() {
    delay( 3000 ); // power-up safety delay
    FastLED.addLeds<LED_TYPE, LED_PIN, COLOR_ORDER>(leds, NUM_LEDS).setCorrection( TypicalLEDStrip );
    FastLED.setBrightness(  BRIGHTNESS );

    currentPalette = RainbowColors_p;
    currentBlending = LINEARBLEND;
}


void loop()
{
    ChangePalettePeriodically();

    static uint8_t startIndex = 0;
    startIndex = startIndex + 1; /* motion speed */

    FillLEDsFromPaletteColors( startIndex);

    FastLED.show();
    FastLED.delay(1000 / UPDATES_PER_SECOND);
}